Showing posts with label crocheting. Show all posts

Tuesday, May 30, 2017

Crochet Baby Blanket


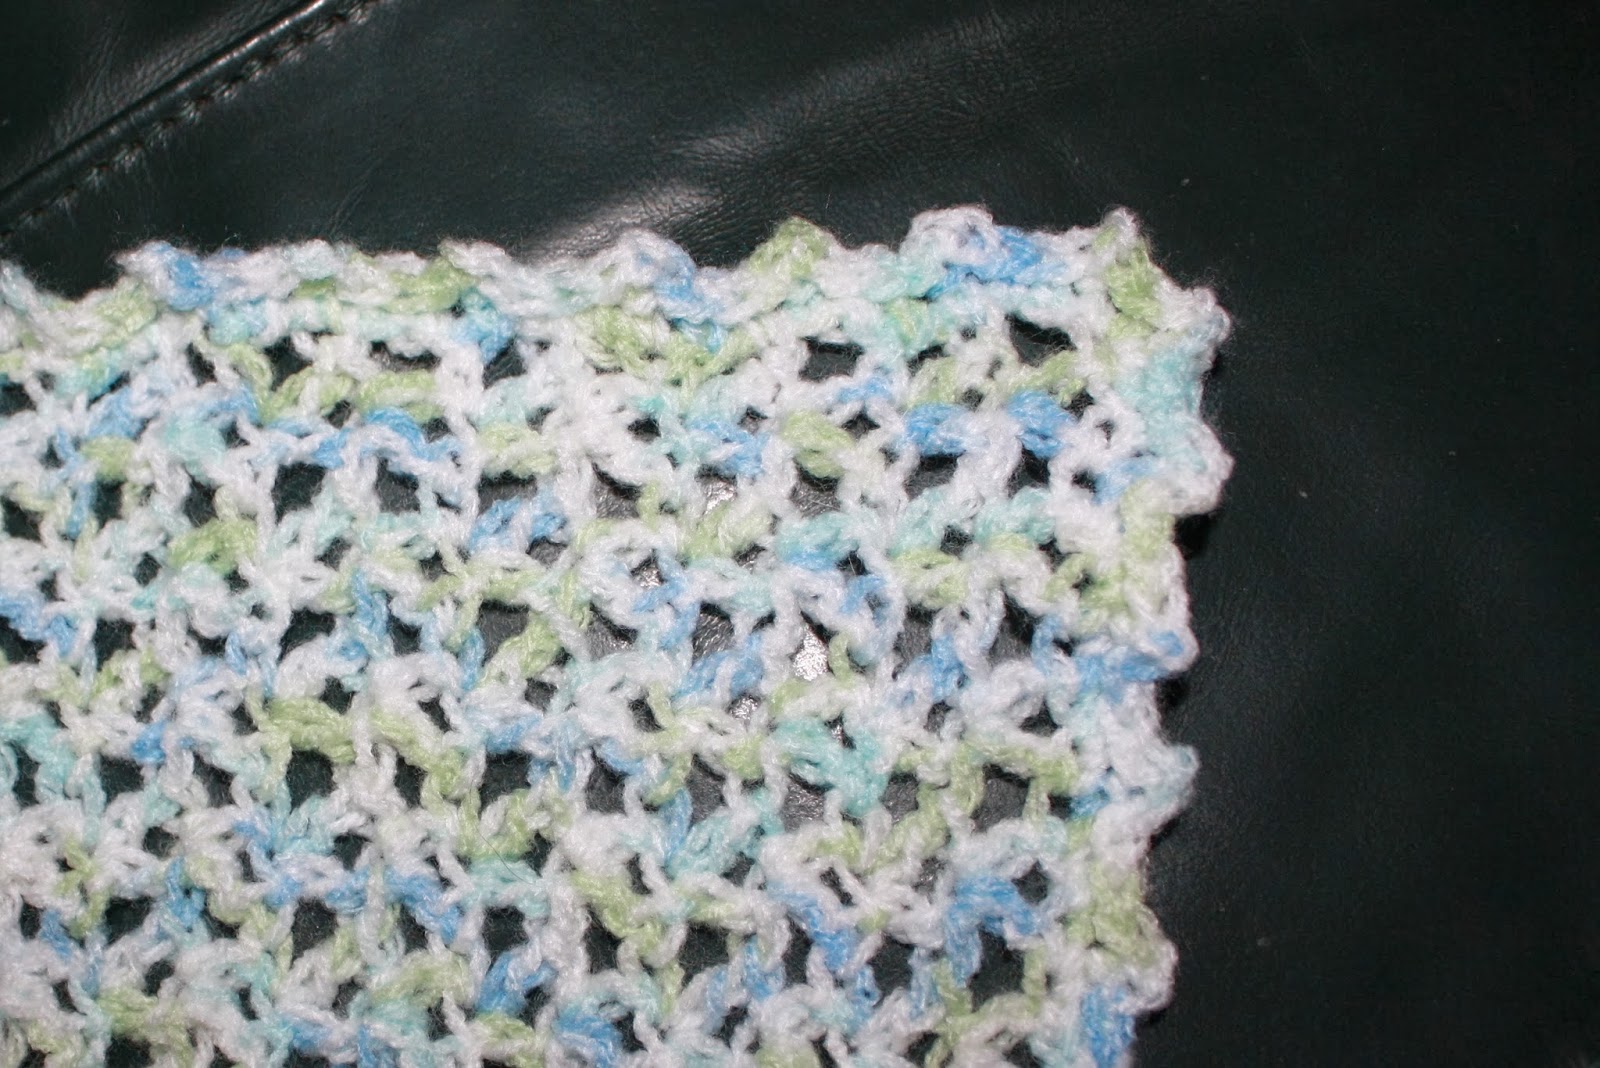
Oh, this baby blanket.  Thought I was just going to burn through getting it done.  I was excited about the simple, repeating pattern, the colors, and that I would easily have it done in less than a week. Started in on it full blast and then, I don't know what happened, it sat in the box since Christmas.  I even kept it right in front of my chair so I would feel like I needed to work on it. I think part of the problem is that I just don't see as well at night as I use to.  There, I admit I have old eyes.  Finally this last week I picked it up and did more than a quarter of it in the past couple days.  Now that it is done I love it,  No baby to give it to on the horizon, but I think I will put it in the fair this summer.

The pattern is leaping stripes and blocks.  A tutorial can be found at Moogly Blog   

Saturday, March 12, 2016

Simply Sweet Giraffe


Made this little cutie from the same book as the elephant, "Animal Amigurumi to crochet" by Annies Crochet.

Tuesday, February 9, 2016

Prunella Pachyderm


Prunella, named after Prunella Scales on Fawlty Towers, one of our favorite shows.


The pattern came from this crochet book I recieved as a Christmas gift.  She looks pretty close to the one on the cover.  I used a much softer yarn than recommended which may have made her not quite as stiff, but who wants to cuddle a scratchy pachyderm? I also crochet in the back of the stitches, which I think makes for a nicer looking surface, but again, isn't as stiff as going through the whole stitch.  Prunella would never be able to stand on that ball. but for all I know the one on the cover is highly photoshopped and all this is a moot point.


The pattern was correct, it's so annoying to start a project and then the pattern isn't right.  They only thing I had trouble with was one leg and that was because I was talking when I should have been counting.  My favorite part is the little tuffy hair on top of her head.

Saturday, November 9, 2013

Crochet V-Sticth Baby Blanket

 
This worked up quick (I did a good portion of it on our trips back and forth to the state fair this summer), but with the large hook it is important to keep the tension constant.  The pattern is pretty much no fail so there is no going back and ripping up rows because you'll know right away if you are off.  Now I just need a baby to gift it to! 
 
The pattern comes from Lion Brand.
I made this larger than the instructions below.  I believe I chained 118 to make it receiving blanket size for the yarn and hook size I used.  Whatever size you want just increase the chain in sets of 3.

BLANKET
Ch 88.
Row 1: (Dc, ch 1, dc) in 5th ch from hook (V-st made), [sk 2 ch, V-st in next ch] across to last 2 ch, sk 1 ch, dc in last ch – 28 V-st.
Rows 2-34: Ch 3, turn, V-st in each ch-1 sp across, dc in top of turning ch.
Do not fasten off.  
 
 
Border
Rnd 1:
Ch 1, turn, work sc evenly spaced around blanket, working 3 sc in each corner; join with sl st in first sc.
Rnd 2 (Picot Edging): (Ch 2, sl st in 2nd ch from hook, sk 1 sc, sl st in next 2 sc) around, working more or fewer sl st as needed at corners to work a picot in each corner and to end rnd evenly. Fasten off.
Weave in ends.

Tuesday, February 5, 2013

Hello Kitty iPod Case


When one of Dancer's friends saw her iPod case Betty she wanted a crocheted case too.  Since Dancer made Betty she got protector cover for the back of her iPod and it doesn't fit in Betty.  That pattern wasn't going to work so we wrote a new one.


I just can't write out a crochet pattern with the steps I have to draw it out like a doily pattern because I can't keep it straight in my head.  This one looks like a hairy caterpillar but it did turn into a case that fits with a cover.  After I do the drawing I can write the steps.

Rd 1 - Chain 10
sc in 2nd ch from hook
sc in next 8 chains
3 sc in next chain
sc in next 8 chains
3 s in chain
Rd 2 - sc in next 9 stitches
2 sc in next stitch
sc in next 10 stitches
2 sc in next st
Rd 3 - Rd ? - sc in each stitch until it is as tall as your Ipod.

Bow:  ch 9, sc in 2nd ch from hook, sc across to the end, ch 1, turn, sc across to the end.  Do this 8 times.  Finish off and fold like a paper fan.  With a piece of yarn wrap several times around the middle, knot and weave in ends. 

Face:  The face is just embroidered on as shown.

Tuesday, January 1, 2013

Felting and Crocheting

So that it doesn't seem like all we did over Christmas break was eat cheese balls and play Farkle we will post a few things we made.
 

Spark got this Alpaca felting kit as a Christmas gift from Grandma Pat.  To felt the wool onto the base piece you need a thick foam block and a needle with barbs on the sides.  Then you stab it up and down over and over and over until it is as flat or as fluffy as you like.  Spark really got into this and seemed to maybe over enjoy himself with the stabbing.  Secretly, I was hoping that he didn't like it because I would have loved to make it and had a hard time keeping my hands to myself as he was working on it. 

 
This turned out so cute but the picture doesn't show it well.  He will put this in the fair as a 4-H project this next summer.  Yeah - one fair project down, several more to go.
 
 
Dancer wanted to make a cover for her Ipod.  It became quickly apparent that the one on the left was going to be way too big for her iPod but the perfect size for her DS.  I finished that one for her so she could get started on a smaller one for her iPod. 
 
The pattern for the DS case was simple. Chain 18, sc in 2nd ch from the hook and in each of the next 15 stitches, 3 sc in the 16th stitch, sc in the back of the loops for 15 stitches on the foundation chain, 3 sc in the next stitch.  From there you just keep sc around and around until it is the height you want.  I put a little loop on the top (as you are on the last round, chain the length of loop you want, skip 2 stitches and keep going).  Sew on a button to fasten. We dc to make but any stitch could be used.  
 
iPod case.  Chain 14, follow directions same as above but instead of 3 sc in each end only do 2 so that it is thinner.  This fit tight enough that it didn't need a loop and button.  After looking at cases on Pinterest Dancer fancied a case with a face on it.  Dancer named her case Betty. 
 
The bow was made by chain 5, sc 4 from the second ch from the hook, turn and decrease to 3 sc, turn and decrease 2 sc, turn sc 2, then increase back up 3, 4, and 4, bind off.
 
The eyes were 14 dc in a magic loop in black.  Crochet two bobbles for the inside of the eyes and thread through the middle of the eye. That is it, just hand sew the pieces onto the case and add a mouth and few eyelashes.   
 
 
I received the Leisure Arts book Kitchen Basics in Cotton for Christmas and I stitched up a couple of the dishcloths.  The one on the left is the Moss Rose pattern and the one on the right is Irish Rose.  These would have been a lot prettier out of four different colors but I used what cotton thread I had on hand.  Need to at least attempt to use up some of our yarn stash. 

Saturday, September 22, 2012

Crocheted Amigurumi Gnome

 
He is really easy, I whipped him up while watching the movie Cocoon.  Actually, he didn't even take the whole movie to get him completed, so it would be possible to make him and still have a little bowl of popcorn.  You can find the pattern here.
 

By the time I got to crocheting the blue yarn I couldn't help but think that I was making a Bomb Pop.

Sunday, September 2, 2012

Clyde The Amigurumi Crocheted Dragon


Dancer made this adorable, little dragon this afternoon and named him Clyde.  She found the pattern here.  She made a few changes to him, for one she made him bigger (4mm hook) then put a few of her own personal touches on him. 


He even has a little stubby tail so that he stands up.  Could he be any cuter?!!!


A close up to show his four horns.  Instead of felt, she used polar fleece doubled for his ears and glued two toothpicks in each one to make them stiff.  The white spot on his lip is his snaggle tooth.  I wouldn't be surprised if we soon have a whole family of Clydes.

Wednesday, June 27, 2012

Donut Recipe (Crochet)


Dancer is entering these yummy donuts in the fair - under needle arts, not food and nutrition.  She made them to go with her crochet coffee cups.   The recipe, or pattern, is from the Lion Heart website but we changed it a bit to make different sized donuts.  The sizes are listed in the (s,m,l) size in the pattern.

Chain (8,10,12)
Rnd 1:  Join with slip st to make a ring.  Work 2 sc in each ch. (16,20,24)  Place marker in first st for beg of rnd; move marker up as each rnd is completed.
Rnd 2:  *2 sc in next st, sc in next st, rep from * around - (24,30,36)
Rnd 3-(8,10,12):  Sc in each st around.
Rnd (9,11,13):  *Sc2og, sc in next st, rep from * around (16,20,24)
Rnd (10,12,14): *Sc2tog, rep from * around - (8,10,12)

Put a blog of stuffing in the middle of the tube you just made and make a hole in the middle of it.  Sew the last round and the first round together to make the donut shape.  Glue on snips of yarn for frosting.

Monday, August 29, 2011

Crochet Autumn Leaves


I saw these leaves and haven't been able to stop making them since.  They are super simple once you make one.  Now I am down to about five minutes per leaf and that includes weaving in the ends.

Leaf Pattern
Round 1:
Ch 4, 11 dc in 4th ch from hook, join with a sl st to top of beginning ch—12 dc.
Round 2: Ch 6, sl st in 3rd ch from hook (picot made), dc in first st, 2 dc in each of next 2 sts, (dc, ch 5, sc in 2nd ch from hook and in next 3 chs to form stem, dc) in next st, 2 dc in each of next 2 sts, (dc, picot, dc ) in next st; (sc, hdc) in next st, (dc, picot, sc) in next st, (hdc, dc, tr, picot, tr, dc, hdc) in next st, (sc, picot, dc) in next st, (hdc, sc) in last st, join with a sl st to 3rd ch of round.
Fasten off and weave in the ends.

A picture play by play of how to make the second round can be found here at www.craftstylish.com

Friday, August 5, 2011

Crochet Coffee Cup


The day after the fair Dancer must have been feeling the let down of being busy for so many days and then all of a sudden nothing is on the calendar.  She whipped out a couple of these coffee cups starting almost first thing in the morning.   


She found the pattern here at the Lion Brand web site.  The original pattern was for a tea cup pin cushion so she tweaked it a little bit.  The top is suppose to be swirled cream in the coffee like you get at those fancy coffee places.  She, and I tried too, with no, luck to get a different design where the white wouldn't be all clumped together on one side.  No matter where we started for the middle, it always came out the same.  Since she made so many tops trying to get the "cream" more mixed up in the coffee she made a couple more cups.
 

Instead of a pin cushion she stuffed them with a bit of fiberfill and the rest with coffee beans.  Mmmmm, do they smell good!

Wednesday, June 8, 2011

Crocheted Teddy Bear

Dancer got another 4-H fair project done tonight.  She started this way back in December and had it all done except for one of the legs.  At that point she put in a bag and there it sat until now.  It took her all of about half an hour to finish it so I am not sure why she didnt' do it in December but whatever.  Here it is the finished bear! 


She couldn't find the stuffing to stuff the legs, this dinosaur/monster thing sacrificed it's life and donated it's stuffing.  Now it will be a toy for Nikki until she rips it apart the rest of the way. 


The Bear Pattern is on the Lion Brand web site.  Dancer found this to be an easy pattern that went together nicely.

Thursday, January 6, 2011

Crochet Ripple Baby Afgahn

I love these ripple afghans and have been wanting to make one.  Dad has a co-worker/friend who is pregnant and due in February so I thought this would be the perfect time to try one, and since it is baby sized it wouldn't be a year long project. 


I started it back in the end of August thinking that, in my big plans, I would whip it right out in a couple of weeks.  But, alas, my interest waxed and waned until this last week when I did a big push and finished it up.  Watching four movies on New Year's Eve really got a lot of it done.  It measures about 40" by 40", just the right size to lay on the floor for baby to lay on or go over a car carrier when the temperature dips really low.  I made it out of soft, soft baby yarn so it will be cuddly.


There are tons of patterns on the Internet for these afghans, the Lion Brand web site has bunch of them.  This pattern I modified from another pattern to get exactly what I wanted.  I can't remember what my starting chain was but the basic pattern is crochet three double crochets, decrease three stitches using a double crochet decrease to make the lower ripple, three double crochets, increase three double crochets to make the top ripple, three double crochets, and then start with the decrease again.  By the time you have gotten going on it you can almost sit in the dark and do it because the pattern is so repetitious.  You can probably tell the pattern better by looking at the picture above than from my instructions. 

Now I just hope the mom and baby like it as I know that people like the matching, themed, name brand baby gear instead of homemade, but this mom is pretty down to earth and it's not her first baby.

Saturday, September 11, 2010

Crocheted Dodecahedron with Points


Dodecahedron or pollen spore?

This was quite fun to make and came together rather quickly.  The pattern said it was intermediate but once you figure out how to connect each of the points it is really quite easy.  After the first three points are together it is smooth sailing from there.  I only ended up having to tear out one partial point before it made sense how to connect them.   Don't let intermediate scare you away.  The directions are here.  I did not use Alpaca yarn as they did, although that would make it really, really nice, the price would be way out of reach for a project such as this.  Something I am not even sure what we are going to do with except throw it around like a ball and maybe I will put it in the county fair next year under stuffed toy or something.  I used a partial skein of yarn that I had left over from a scarf which made the price quite minimal, maybe a dollar or two including the stuffing.

Monday, August 16, 2010

Crochet Halloween Boo Ghosts


Just finished these up, they are quite easy.  The pattern can be found here.  I changed the pattern a little bit.  The pattern was to make each round separate by single crocheting at the beginning of each round and joining at the end, I just made them one large spiral and skipped individual rounds.  I think it looks neater if there isn't  that extra stitch in there.  I also positioned them a little different to my liking.  I had these done in a couple of nights.  If you had time to sit down you could probably have them done in about 3 hours give or take. 


Whipped up this pumpkin to with the ghosts although it is quite large compared to them.  If they were fun size ghosts it would be perfect, he can be made smaller by decreasing the number of stitches in the beginning chain.  The pattern for him can be found here.  Dad was using the computer when I was ready to make the stem so I couldn't look at the pattern.  I just made up my own stem, which is a longer so it can bend over and a leaf to go on as well.  When I sewed the stem to the pumpkin I made large stitches to give him the sides of the stems since pumpkins don't have neat little stems that come out the top like an apple, they are splayed over the top.

Thursday, July 22, 2010

Crochet purse/clutch

<>
<><>

I got this book from the library.  Don't click on it to look inside, that was on the picture I lifted from Amazon.  Found a pattern in it for a purse.


Used some scrap yarn to make this little clutch. 


Lined it with a left over piece from Dancer's skirt and sewed in a zipper. Now everyone is asking for me to make them one but I returned the book and don't have the pattern any more. Besides, if I make one for everyone else mine won't be an original.

Wednesday, July 21, 2010

Crochet afghan


This is the afghan I am putting in the fair.  I am unable to get a decent picture of it.  Where I can get a good picture of the color the camera doesn't want to focus and in the light it looks awful.  Maybe tomorrow I will take one in natural light and change the picture.

Otherwise, it is a pattern for a dish cloth that I liked so much that I made it large into afghan size.  The yarn is super soft and has rich dark colors.  Dancer picked out the yarn to do a project and then lost interest in it.  I loved the yarn and couldn't let it lay unused so I tore out what she had abandoned use it.  I did have to buy a few more skeins, she only had two and I think this used about seven.  It is all double crocheted and grew quite quickly.  I started it in April and by working on it a little here and a little there I have it done in less than four months.  Nikki likes it, every time I would sit down to work on it she would want to crawl underneath it and hunker down.  When it was a little about a foot and  half across she would come and just put her snout under it.  Spark thinks it could be a portal, where you would jump into the middle of it and come out somewhere else.  Either that or a spider web.  I didn't think it was going to have some many imaginative possibilities when I started it.

Saturday, June 12, 2010

Crochet Egyptian Headdress

I made this Egyptian headdress for our vacation bible school program this summer.  The theme is Joseph's Journey Prison to Palace.  The first one of these I tried I used gold yarn.  When I got it done it looked more like a milk maid cap not even close to anything royal looking.  For this one I used a gold cording that I found in the yarn aisle.  The package said it was for plastic canvas but it crocheted up wonderfully.  The package was 27 yards.

Super simple to make.
1st round:  ch 4. dc 11 times in first stitch of ch.  1 sl st in 3rd ch from beg. of round.
2nd round:  ch 3.  dc in 1st st. 2 dc in each stitch to end of round. sl st in 3rd ch from beg of round.
3rd round:  ch 3. dc in 1st st. 2 dc in each stitch to end of round.  sl st in 3rd ch from beg of round.
4th round:  ch 3.  dc loosely in each stitch in round.  sl st in 3rd ch from beg of round. 

leave end long for one of the dangley beaded ornaments and pull through.  Cut remaining cord in equal lengths for beaded ornaments.  About every 3 st around back tie cords in 1/2 clove hitch leaving front of head piece bare.  String beads on cords and glue ends to secure beads. 

The stringing of the beads took me a really long time, I had a hard time getting them on the cord because it would fray.  I ended up cutting the string inside the cord a little shorter than the gold outside to make the cord thinner.  If you have enough cording left over you can put more of the long beaded cords on the back and shorter ones on the front. 

Crochet snake


Salvatore

Dancer crocheted this friendly reptile, he was quite easy once she got the hang of the pattern to make him twisty.  His pattern is free here:  Salvatore  A few things she did different on him was to use a variegated yarn instead of using two different  colors and he is much longer than the pattern.  She just kept adding rows until she like how long he was.  He cost less than a dollar.  The yarn  was a dollar a skein and she didn't use a whole skein and there is but a bit of stuffing in him.

Wednesday, May 5, 2010

Itty Bitty Ballerina Bear

Itty bitty ballerina bear doing a side jette.

This little ballerina bear is crocheted from the book "itty bitty animals" by Sheila Leslie. She took me, I think because I didn't keep real close watch of the time, about nine hours. The stitches were so little, and my eye sight isn't what it use to be, that I could only work on her during the day in direct sunlight.
.
To give you an idea of her size, here she is by a ball point pen

and a spool of thread.