Thursday, March 29, 2012

Silhouette Plates


Dancer searched on the Internet for silhouette pictures using google images and typing in silhouette and then goat, bird etc. to find the pictures for the plates.  She enlarged it to fit the plate, which we bought at the Goodwill for 45 cents.  Tape it to the front of the plate with the picture showing through to the back of the plate and trace around it with a black Sharpie marker.


Using black acrylic paint she filled in the outline.  This took a few coats to completely cover it to where no light shown through.


She let it dry and then sprayed it with white spray paint.  Do this step outside and if you do it in your garage, which is a good idea because the door can be shut so the cats don't jump on them, then pull out the car or it too will have a new paint job.  To get good coverage she put on four coats of the spray paint and they could use at least one more.  The paint said it took 10 minutes to dry between coats but they are tacky so she will let them sit tonight and spray them again in the next day or so.


All done!  These turned out looking like something you would buy in a store. 


Since the paint is on the back of the plate they can be used for food.  If you want to wash it, it should also be sprayed with a few coats polycrylic protective finish.  Hers are only for decoration so she is skipping that step. 

Bert Gets A Little Blog Time


Bert likes to sit on Spark's shoulder, but while that sounds cool, he has really sharp claws like pins sticking you.


Giving a loud squawk - no, he was yawning, sorry we are boring you Bert.


Give me some string cheese and nobody gets hurt.


What he really does when the camera comes out is to start hamming it up.  I swear he knows what a camera is because he starts posing, dancing and doing all his get attention tricks the minute he hears the camera turn on.

1st Place Awana Grand Prix Winner!


Dinner was served first, but Spark was so excited that he ran right downstairs to have his car weighed, measured and entered.


After he put WD40 on the wheels he gave it a couple test runs.


Finally, he was able to settle down enough think about eating and got in line for a hotdog and other goodies.

As an added bonus he was chosen to present the colors at the beginning of the night.  The girl in the picture is in my class, great kid.


The tension turned it into a nail bitter.


Racing against another of the girls in my class.  Who to cheer for?  All of them!


Victory!  His came in first in every race.  The man with his back to the camera is Spark's teacher, one of the most patient men in the world and a great role model for those boys.


1st Place!  He was more than pumped.  After he was asked to race against the Trek and SWAT kids and he beat all them as well.  Don't know what made his car so fast but hopefully he can repeat it next  year.  Actually, for next year he has his eye on the design prize.

Wednesday, March 28, 2012

How To Replace and/or Install A Toilet

Spark's grandpa is having knee replacement surgery and wanted a taller toilet.  They actually had an abnormally short toilet at the place they just bought.  "Curse you tiny toilet!!!"  We volunteered to swap the toilet out for them. 

The important first step not shown here is to turn off the water supply from the wall, otherwise you will be sponging for eternity.


After the water is off, flush the toilet to empty the tank.  The tank still has water in it, so soak it up with a sponge.  This takes a while, but you have to carry the old toilet out through the house so do a good job.

The tank is held onto the toilet with a couple of bolts.  Unscrew the nuts under the tank and lift it off, you can see why it needs to be empty.

The toilet still has some water in it so sponge more out of the hole where the tank was.


There is a bolt on each side of the toilet to fasten it to the floor.  Unscrew these and lift the toilet off.


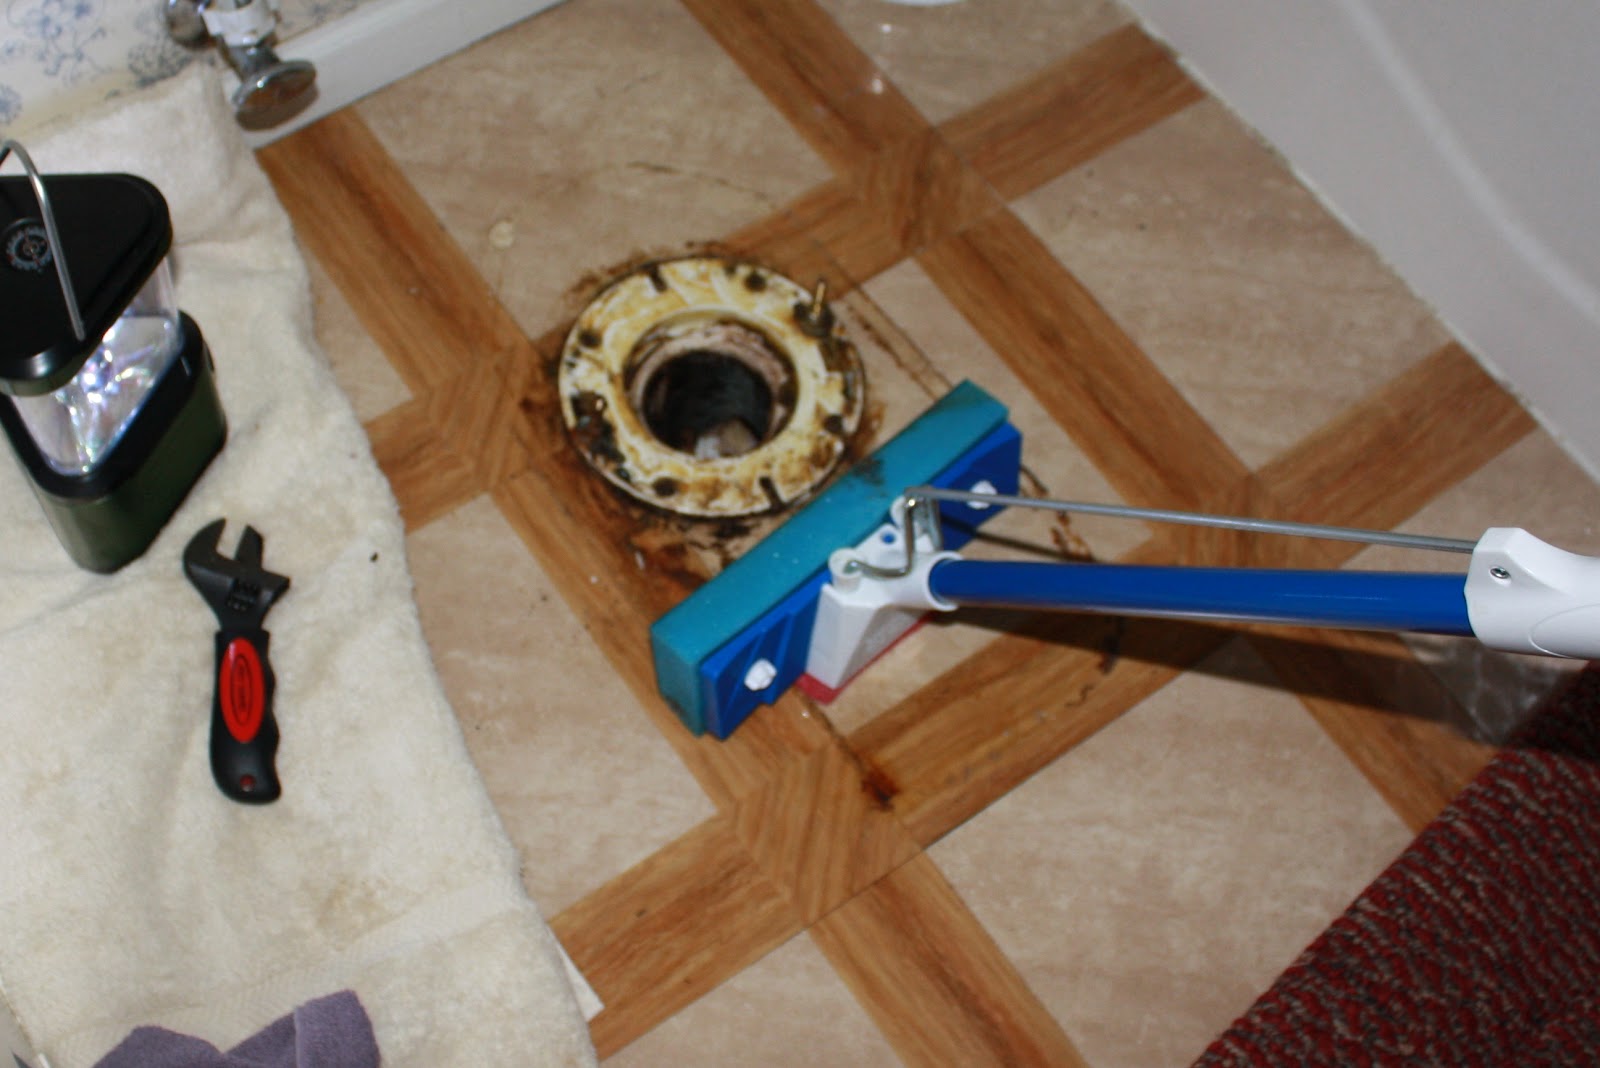
Under the old toilet there is a yucky wax ring.  You will need to scrape this wax off and use a new wax ring.  It is really sticky, use a putty knife or blade screw driver.  You are doing this over the waste pipe so it may not smell like spring flowers.  It looks gross but so does the new wax ring.


The floor under a toilet is usually pretty dirty from years of condensation in the summer humidity, mop it before you continue.

Here Spark is taking off the water supply from the wall and putting on a news water supply.  The new toilet is taller so the old supply line won't reach.  If it would reach you can skip this step, or you can get a new one anyway.  They only cost a couple dollars and new ones are made with a stainless steel mesh that won't burst.  It is also easier to change now with the toilet out of the way. 


Taking the new toilet out of the box, it's heavy!

Put the new wax ring on the toilet, not on the floor drain.  You can see it looks gross even when new.  You will need to press it firmly onto the toilet, when you flip the toilet over to install it needs to stay in place.   Set the toilet onto the bolts sticking up from the drain.  The plastic flange in the wax ring points downward into the drain pipe.  We used the old bolts, they were in good shape.  The toilet comes with new bolts if you need to swap them.   Push the toilet on straight down, don't rock it back and forth!!   You really, really want it to have a good seal.

Apply new nuts onto the bolts.  New toilets generally come with plastic nuts and steel bolts.  The plastic nuts are nice because it is a pain to try and get corroded rusty pieces apart.  Put the new tank, not shown here, on the toilet, two nuts and bolts hold it on.  There is a rubber gasket that fits between them to prevent leaks.

Hooking up the new water supply to the bottom of the tank.  Make it tight but don't turn it so far that the float valve inside the tank is turned or twisted.


Putting the seat on the toilet. 

Turn on the water supply and watch the tank fill up.


Putting the new cover on the tank, almost done.


Invite Grandma in to check out the new toilet.  Remind her to "enjoy the go".

Kacheeker's Photo Shoot

All photos by Dancer


Tuesday, March 27, 2012

I'm A Lumberjack And I'm Okay

Last year when we had bad storms we lost a lot of branches.  We cleaned up what seemed like a never ending supply of them but there are a few that never completely broke off of the trees.  It looks awful and makes me nervous that they are going to spontaneously fall on someone, so Dad hooked up a rope to a couple of them an pulled them down with the truck this weekend.


Spark was eager to try out the chainsaw so we let him have a go at it.


Dancer wanted to give her hand a try at it but she cut one branch and decided it wasn't for her.  Spark took over and kept on cutting.  While he was cutting the rest of us were stacking the burnable wood on the pile for bonfires and the branches behind the barn where we will have to burn them as a brush pile.

Sign of a working man is when the coat comes off.

Then to surprise us even more he took the rake in hand and started cleaning up the remaining little twigs and leaves.  He is usually more of a spectator when there is work to be done if we see him at all.  I like this new change!


Spying one more smaller branch that was hanging down, he took out the little step ladder, armed himself with the branch clipper and went at it.  I was a little nervous when he came out with the step ladder as we never know what he is going to do.  One time he came in the house and said, "I need a helmet and a cinder block, where do we keep them?"  After that I have always been a little leery of his plans.


While Spark was struggling with the branch, Dancer and I sat down on the tail gate to watch him and a refreshment. 


When I went in to shower he was still battling it, claiming that it would "not dupe and/or frustrate" him.  I think it is still hanging on the tree.

Along with the maple branch Dad pulled down these huge tops off of two pine trees.  These we will cut the branches off and probably haul to the dump when it opens.  Dried pine branches burn just like gasoline and having the fire department out is not something we are real interested in.  The trunk we will cut up for firewood and enjoy the smell of Christmas when we burn it.  It really smelled good from Dad just cutting the branches off. 

Thursday, March 22, 2012

Pancake Taste Testing

The other teen at co-op is also in 4-H, a different county but they all have the same project areas.  Dancer and her both participate in gym and art but not science since we are doing a grade school science book.  This last week they did the foot work for a consumer education project. 
Together they made four different kinds of pancakes, three from box mixes and one homemade.  During our science time they were busy mixing and frying pancakes.

We forgot our griddle so Dad called a lady he works with that lives in town and asked to use her fry pan.  Thanks Kristin :)


They fried and fried all these cute little pancakes.

On the plates they numbered 1 through 4 and then put a pancake on each number.

After the kids tried them all, without syrup or butter, they each got a Lego piece and dropped it in the bag with the number of the one they liked the best.  Homemade won by the way.  After the testing we made large pancakes and everyone had a pancake lunch, with syrup and butter this time. 
Next week the girls will have to figure out the cost of each one and plan how to display the information.

The rest of the day we went to the library, did a little shopping, found a few geocaches and ultimate Frisbee started up again.  The kids played Frisbee late and I said I don't have anything planned for dinner so we should stop for something or it will be at least 8:00 before we are eating.  We ended up having super at Five Guys.  While were sitting there, Dancer said that it was just the best day ever.  I asked her if was as good as a birthday day and she said it was for sure.  So happy to have those once in a while, I thought it was a great day too.